Getting started
This page takes you from nothing to one service behind Paduraksa with HTTPS. It needs Docker 20.10 or later with Compose v2.
Paduraksa v0.1 is a single node: one process, one data directory and three listeners.
| Port | Used for |
|---|---|
| 80/tcp | HTTP, ACME HTTP-01 challenges, redirects to HTTPS |
| 443/tcp | HTTP/1.1 and HTTP/2 |
| 443/udp | HTTP/3 |
| 9443/tcp | The admin app: dashboard, REST API and, if you turn it on, MCP |
1. Start it
Put deploy/compose.yaml in a directory of its own and create the master key beside it:
mkdir paduraksa && cd paduraksa
curl -fsSLO https://raw.githubusercontent.com/hizkifw/paduraksa/main/deploy/compose.yaml
head -c 32 /dev/urandom | base64 | sudo install -m 400 -o 10001 -g 10001 /dev/stdin master.key
docker compose up -d
- The compose file runs
ghcr.io/hizkifw/paduraksa:main, which CI publishes from every commit onmainthat passes, for amd64 and arm64. master.keyopens the vault, which holds every certificate key, DNS credential and TOTP secret. Compose refuses to start without the file.- Copy
master.keysomewhere other than this machine now. Nothing else opens the vault. See The master key. - The ports are mapped one to one on purpose. Do not remap them:
Alt-Svcand the HTTP to HTTPS redirect advertise 443.
Running with Docker covers building the image yourself, bind-mounted data and the container hardening.
2. Read the setup token
On its first start Paduraksa prints a boxed banner with a one-time token that creates the first Owner. The token is also written to /data/setup-token.
docker logs paduraksa 2>&1 | grep -A8 "Paduraksa first-run setup"
# or, at any time before setup completes:
docker compose exec paduraksa paduraksa setup-token
The token is single-use. Paduraksa deletes it once an Owner exists.
3. Trust the local CA root (optional)
The admin port is HTTPS only, and its certificate comes from Paduraksa's own local CA. Until your browser trusts the CA's root, you get a certificate warning.
The compose file publishes the admin port on loopback only. Open it on the server itself, or from your machine through an SSH tunnel:
ssh -L 9443:127.0.0.1:9443 you@server
To open it on your LAN instead, see Exposing the admin port.
The root is served before setup, so you can trust it first:
curl -k -o paduraksa.crt https://localhost:9443/api/v1/ca/root.pem      # PEM: Linux and macOS trust stores
curl -k -o paduraksa-root.crt https://localhost:9443/api/v1/ca/root.crt # DER: Android and iOS offer to install it
curl -k https://localhost:9443/api/v1/ca                                # fingerprint, subject and validity as JSON
-kis needed only because the certificate is not trusted yet.- Linux:
sudo cp paduraksa.crt /usr/local/share/ca-certificates/paduraksa.crt && sudo update-ca-certificates.update-ca-certificatesreads PEM and ignores a DER file, so keep the.crtname on the PEM. - macOS: add it to the System keychain and mark it trusted.
- Windows: import it into Trusted Root Certification Authorities.
4. Create the Owner and sign in
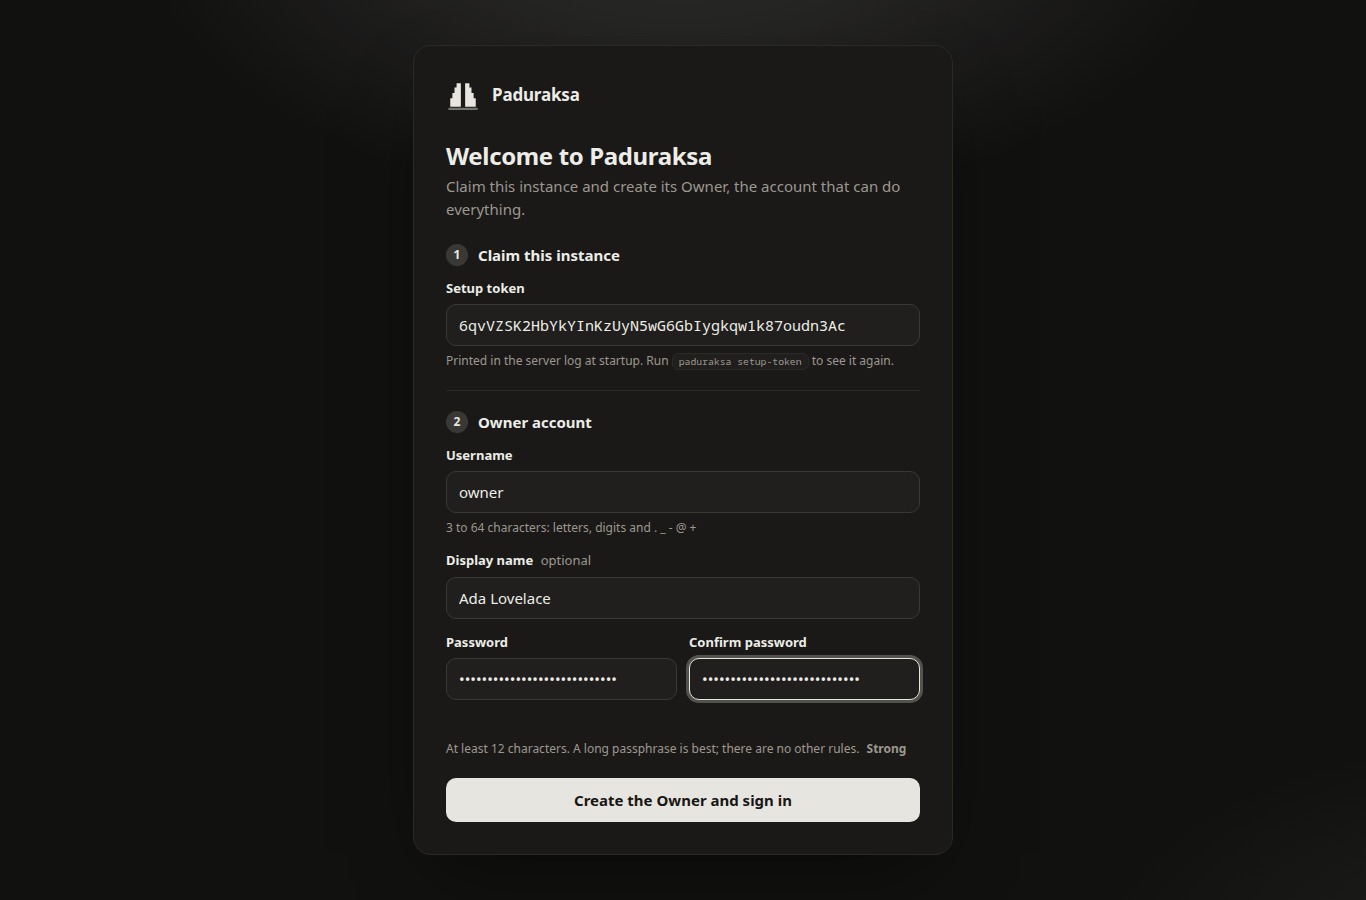
Open https://localhost:9443/ (or https://<host>:9443/). The setup page asks for:
- the setup token;
- a username (3 to 64 characters: letters, digits and
. _ - @ +); - a password of at least 12 characters. There are no composition rules, so a long passphrase is best.
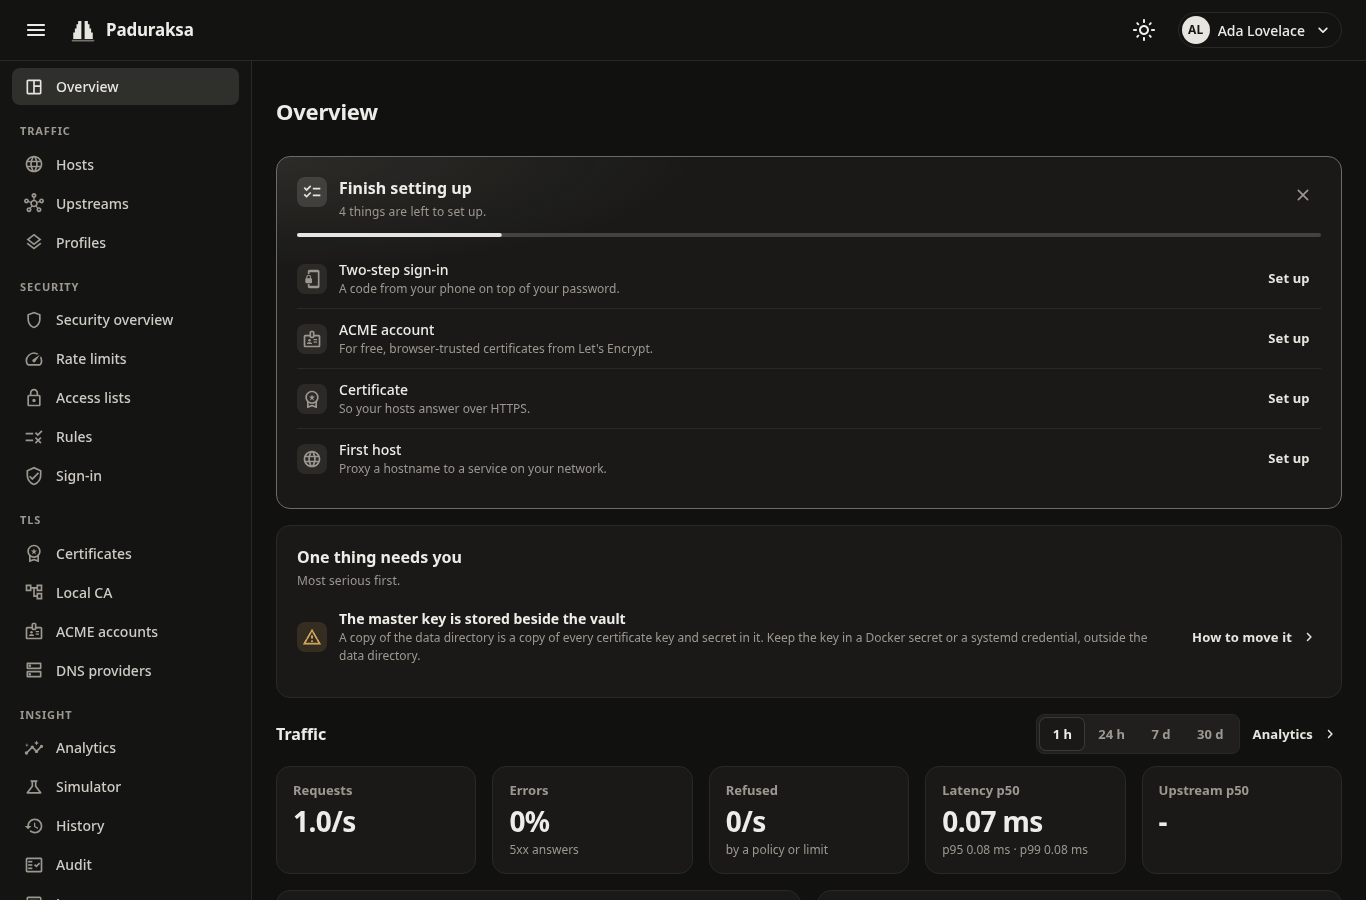
You land on the Overview, whose Finish setting up checklist lists what is left: two-step sign-in, an ACME account, a certificate and a first host.
Tip
Set up two-step sign-in (TOTP) from My account now. It is optional, and nothing forces it, but every Owner and Admin should have one. The dashboard shows ten recovery codes once. Keep them.
A plain http://<host>:9443/ request is answered with a redirect to the same URL over https://. No page is ever served over plain HTTP.
5. Put a service behind it
A host answers for one or more names. A route on it sends a path to an upstream, which is a set of destinations. The next steps use a service at http://jellyfin:8096 as the example.
Get a certificate
- Open ACME accounts (TLS) and add one. Pick Let's Encrypt, optionally give a contact email, and agree to the CA's terms. Try Let's Encrypt (staging) first if you are unsure: its limits are generous and no browser trusts its certificates.
- Open Certificates, then Add certificate, then From an ACME CA. Enter the hostname (
jellyfin.example.com), pick the account and a challenge:- HTTP-01 needs port 80 of the hostname reachable from the internet. It cannot issue wildcards.
- DNS-01 needs a DNS provider (Cloudflare or deSEC) and nothing reachable. It issues wildcards.
- Watch the progress. Issuance continues in the background if you close the dialog.
For a name that only exists on your LAN, a public CA cannot validate it. Use From the local CA instead. See TLS and certificates.
Add the host
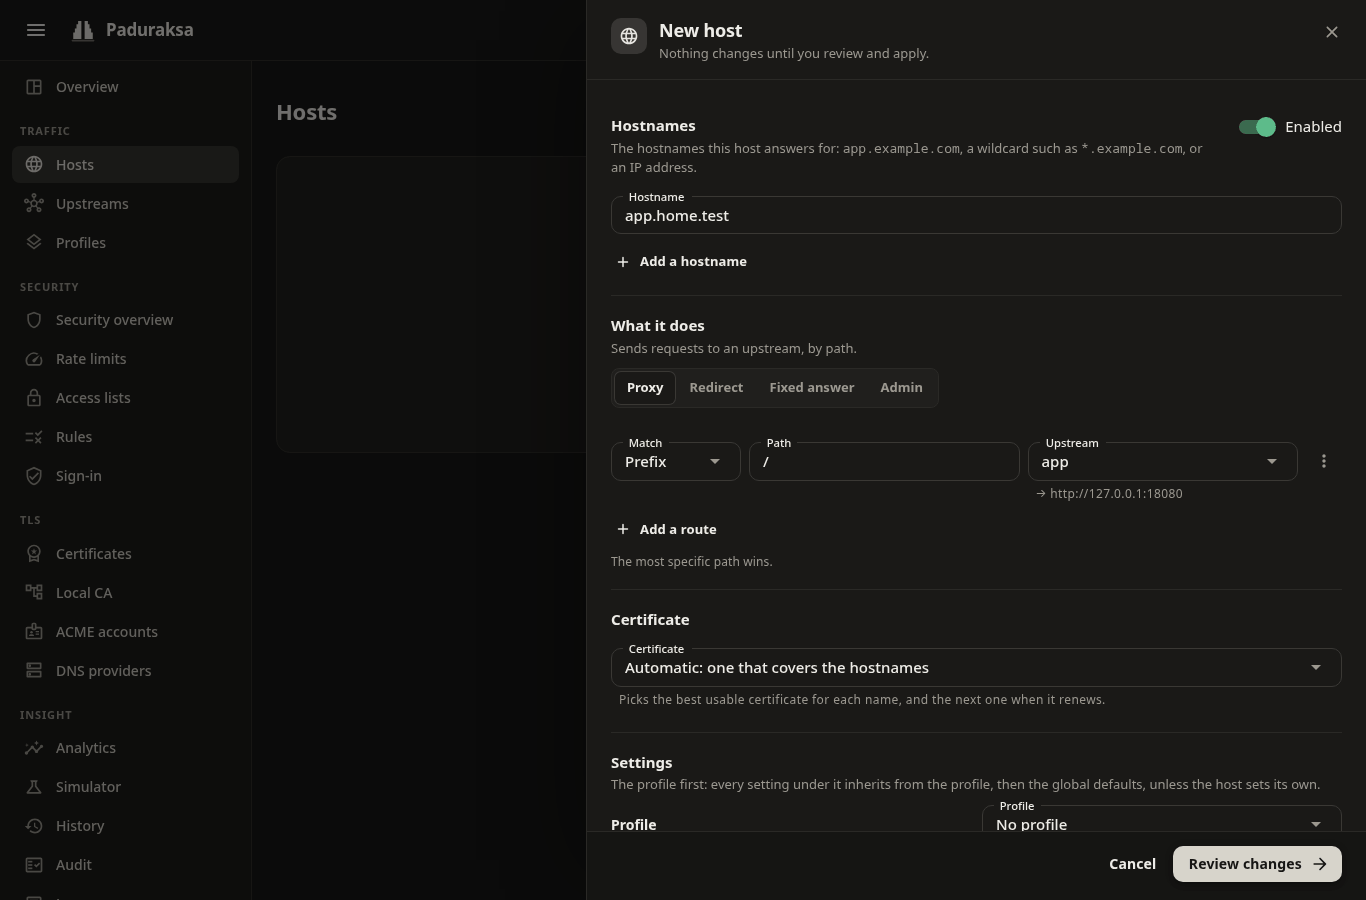
- Open Hosts and choose Add host.
- Enter the hostname.
- Under What it does keep Proxy. In the route, keep Prefix and the path
/, and for Upstream choose New upstream.... Name it and give it the destinationhttp://jellyfin:8096. - Leave Certificate on Automatic, which picks a certificate that covers the hostname.
- Choose Review changes.
The review sheet shows exactly what will change, with the compiler's warnings. A warning that no valid certificate covers the name means step 1 is not finished.
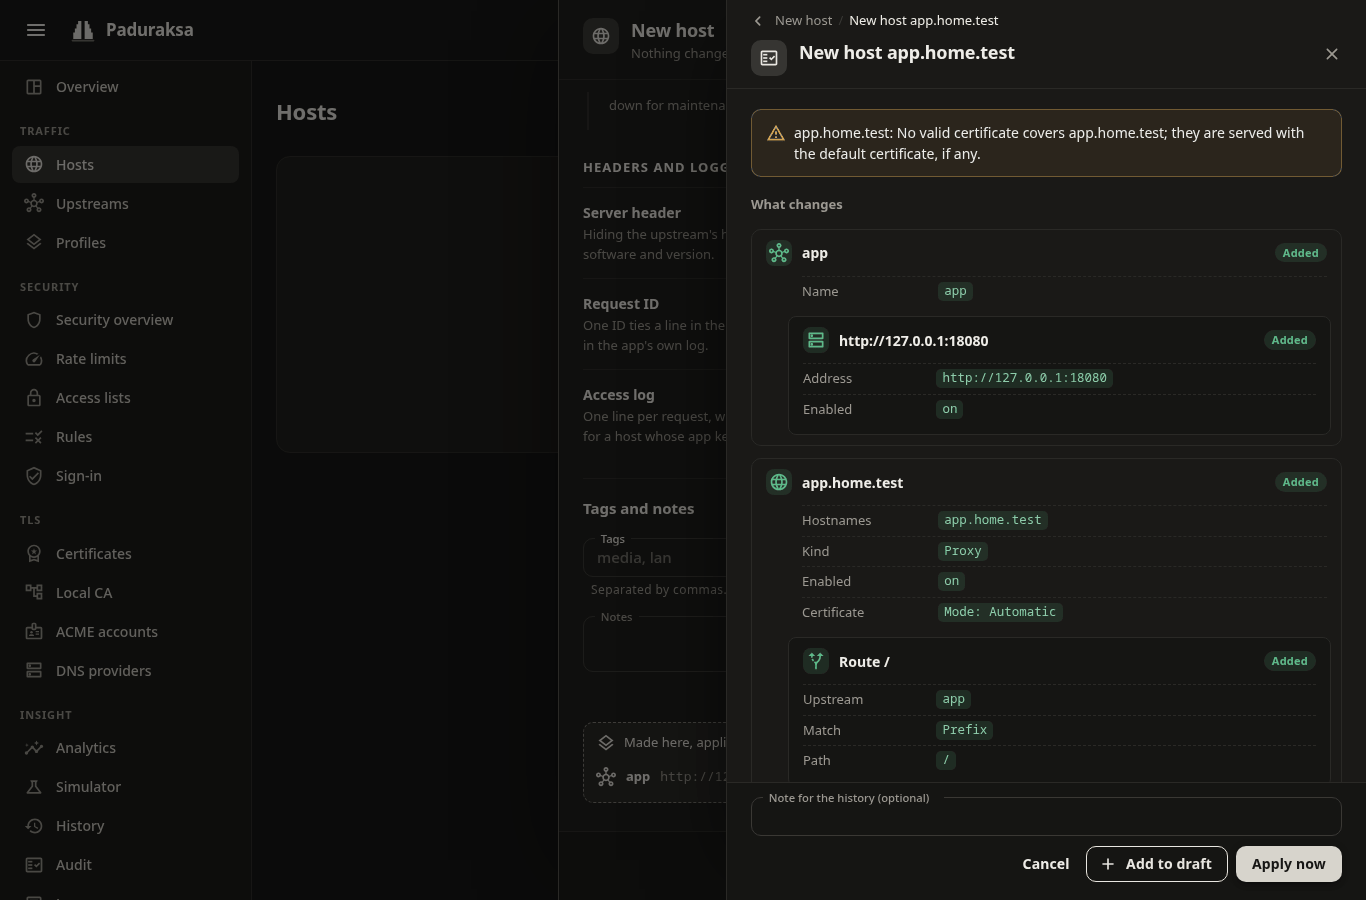
Choose Apply now. The change goes live in milliseconds without dropping requests, and the toast offers Undo.
Every config change goes through this review. Hosts and routes explains drafts, which collect changes made on several pages and apply them as one revision.
Check it
curl -I https://jellyfin.example.com/
The public listeners answer as soon as a host matches. The admin certificate never serves proxied traffic.
Note
The host's DNS record must point at the machine that runs Paduraksa. To test before changing DNS, use curl --resolve jellyfin.example.com:443:<server ip> https://jellyfin.example.com/. The Simulator (Insight) also answers "why was this routed, redirected or refused" for any request, against the live config or a draft.
Where next
- Hosts and routes: redirect and fixed-answer hosts, profiles, settings layers, maintenance mode.
- Upstreams: several destinations, health checks, timeouts, HTTPS upstreams.
- Access control and WAF: lock a host to your LAN, add sign-in, rate limits.
- Backups and restore: make one before you rely on it.